This is part of a series of posts to help you navigate the COVID-19 Quarantine. New posts and resources will be released over the next few days and maybe weeks as we see where and how things are going. If you haven’t already joined the Reflexology Marketing Facebook group, I’ve got a pack of free graphics for all the members to use right now. There will also be updates and announcements of new resources announced via email, so sign up now if you haven’t already.

Virtual Business Tools – Thankfully there are a number of tools, resources, and software out there to help you adapt your reflexology practice to work virtually with video consultations, trainings, and digital products you can sell to keep bringing in income during the COVID-19 social distancing quarantine. And many offer free or low-cost options.
I only recommend tools I have personally used and like. If they offer an affiliate program, I may use that link. Affiliate links don’t cost you anything (sometimes they even get you a discount) and I can earn a little money if you make a purchase. No matter what though, my reviews and suggestions are always focused on what’s in your best interest, not my financial best interest.
Table of Contents
[lepopup slug=’5-free-graphics-inline’]
Video calls – one-to-one
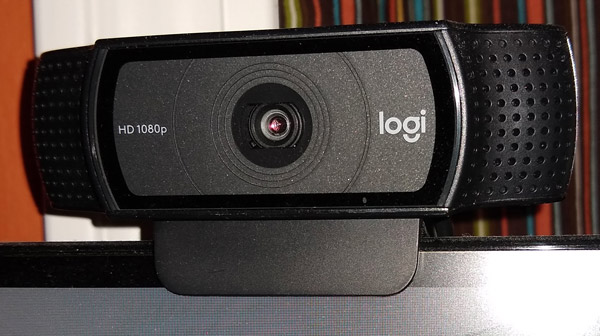
You will need to have a computer with a camera and microphone (most newer laptops have them built-in, but you need to add one to a desktop computer) or use a tablet or smartphone. The person you are doing a video call with also needs to have a camera and microphone too. (There are workaround options, but the easiest is just to use a phone call if they don’t have a camera and microphone for video calls).
With the free video tools, you’ll still need to schedule one-to-one calls like you do in-person sessions and you’ll need to set up a way for them to pay online or mail you a check.
UPDATE 4/14/2020: There has been some concern with Zoom. I’ve found another alternative called Jitsi that might work better for both one-to-one calls and group calls. It’s completely free. It uses open source software and my husband who is a Network Manager (IT person) switched his company over to using it successfully instead of Zoom while they are working remotely. I can do a tutorial on it if there’s interest. Let me know.
Zoom
I think the easiest free option is Zoom. You can use it on your phone (using their app) and on your computer. Both people will be asked once to download and install Zoom if they’ve never used it before. (Details on how this works https://support.zoom.us/hc/en-us/articles/201362193-Joining-a-Meeting)
For one-to-one videos, Zoom is free. Prior to the Coronavirus, if the person you’re calling didn’t have a camera/microphone, they could watch your video and use the call-in number provided by Zoom to talk to you using their phone. This has been restricted on free plans though because their systems were overwhelmed (It’s still an option on paid plans). You can record, screen share, use the chat function, and more all on the free plan. The only other limits that will likely affect your needs on the free plan are when you have more than 2 people on the call. For group calls, Zoom is limited to 40 minutes on their free plan.
Here’s a video I did on using Zoom for the More Feet Club members. This is what I’ve been using to do live members-only group calls. While it’s showing how to join the call as a participant, it gives you a good idea of how the experience works to see if you like it for your own needs.
Skype
If your clients don’t want to download something and already have Skype, that’s another free option. I find Skype a bit less user friendly so it’s not my first choice for all of you unless your clients are already using it or you’re already familiar with it. Since Microsoft bought Skype, it is now something most PC users have already on their computers though.
You can share screens, record the session, chat, etc. with it just like Zoom.
https://support.skype.com/en/faq/fa34807/how-do-i-find-new-contacts-in-skype
Meet Fox
I’ve included Meet Fox in the video tutorial and listed it as a low-cost option via AppSumo below (if you want something that you can continue using once we’re able to return to in-person interactions) but if you want a free option that’s not getting as bogged down as Zoom is and doesn’t require any software to be installed, Meet Fox now has a free offer for the next 2 months. You also can do online booking and accept payments via MeetFox . Here’s what they said:
“To help small businesses through COVID 19, we have decided to offer our tool for free for the next 60 days to any new users.
The code ‘remotework’ will activate a free MeetFox plan.“
Other free options
Google Hangouts, Facebook Messenger, What’s App, FaceTime (if both people are using iPhones)
Low-cost option if you need booking and payment integrations
MeetFox is available via an AppSumo deal (AppSumo offers amazing prices on lifetime deals for up and coming software to give them some capital and exposure). I wanted to offer a way to book a consultation with people paying upfront (so I don’t have to manage the billing) and have the system automatically send out the link to the video call and reminders, etc. However most of the booking software would cost me at least USD $10/month and this deal was only $59, so I decided to try it. I just purchased it and haven’t used it much, but so far I like it and the deal is hard to beat if you don’t already have an online booking software that allows payment integrations. Another bonus to MeetFox is that you don’t need to download anything to use it. It’s all web-based. And the AppSumo offer includes calls for up to 4 participants (you +3 more).
Video calls – for a class or group of people
If you want to be live and have multiple people live on the call with you, Zoom caps their free plan at 40 minutes. The first time you go over they might give you a bonus, but after that, they will just end your call abruptly when you hit 40 minutes.
I have used Skype for a couple of mastermind groups that I’m in and use Google Hangouts for another one.
For a group that meets regularly with the same people each time, once it’s set up, I think Skype is the easier option.
If you want to just provide a link and allow people to join and be seen on the screen so you can all interact with each other, I’d say Google Hangouts is better. If you want a tutorial on this, let me know or check out Google’s support file for it.
If you want to be live with your clients watching you only or interact with chat messages only and not voice, you can use Facebook, Instagram, or YouTube to go Live.
You’ll need to manage scheduling and payment options and then provide people who’ve paid with the links or access to the calls with the free options mentioned above.
If your group only has you plus up to 3 more people and you want something easier than Skype or Google and longer than Zoom, I’d recommend MeetFox via the AppSumo deal.
If you need more than 4 people on the group call and aren’t happy with the ease of the free options, I’d recommend a paid Zoom plan. You can create a link that goes out to everyone eligible to join, so just those who paid, or provide the link for anyone to join. People can use the call-in feature if they don’t have a camera/microphone option on their computer or enough data on their phone plan, etc. It’s USD $14.99/month and you can pay for just a month or two and then cancel when things get back to normal.
Video recordings – how to record
The best tool for recording a video will depend on what you want to share.
If you want to record yourself, you can use:
- The camera on your phone
- The camera on your tablet
- The camera on your computer or laptop using Zoom (see video below)
- Even a regular camera if you can send the file to your computer via USB or SD card, etc.
If you want to record your screen including presentation slides, graphics, etc.
- Zoom is probably the easiest free option (see the video below that shows how easy it is).
- Screencast-o-matic is the software that I used to record the video below, the only downside to it for all of you is that it’s a little more complex than Zoom and the free plan adds a watermark with their logo. Upgrading to the Screencast-o-matic deluxe plan (what I use) is USD $19.80/year and gets rid of the logo watermarking and adds some editing capabilities.
You can also record your group meetings using both Zoom and Skype, just make sure you have permission from those attending before recording them to distribute to others.
Video recordings – how to share
It’s easy enough to upload a video to YouTube or Facebook to share it publicly, but if you’re recording videos to earn an income with you’ll an option to restrict who has access to it. Options include:
YouTube
When you upload a video to YouTube, it gives you a few publishing choices. You can choose to make it an unlisted video. This restricts viewing the video to only people who have the link to view it.
Facebook groups
If you’re providing videos as part of a class or membership with multiple members, you can create a private Facebook group. Pay attention to the privacy settings and only admit people who’ve paid. There are pros and cons to Facebook groups. They are easy because people are often already on Facebook, but if people don’t turn on notifications, you’re at the mercy of the algorithm to ensure they see your posts. Unless you tag each person in the post or comments.

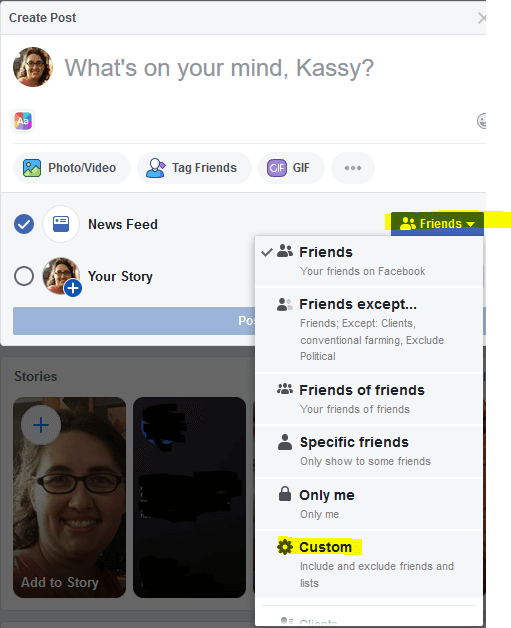
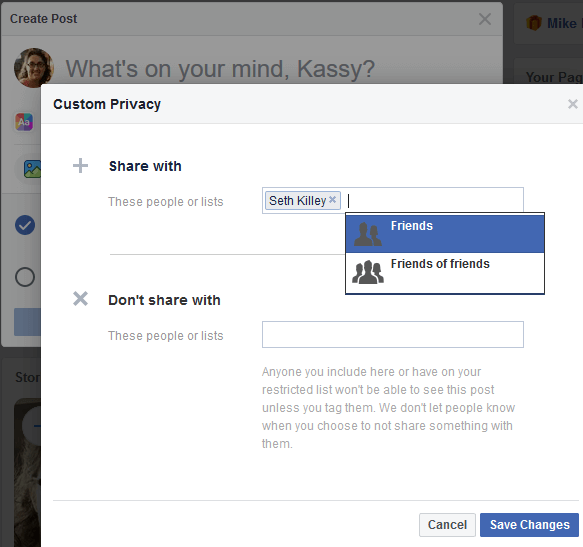
You can also use your Facebook personal profile if you’re friends with people and adjust your sharing settings to share only with one specific person or even a list you’ve made with a group of people. The risk with this is that you might forget to change your settings back or accidentally share it with everyone. It’s not an ideal long term solution but could work for a few weeks if you’re extra diligent on the settings. You’ll also want to tag them to ensure they see it.
Password protecting a page on your website
Most website platforms allow you to set a password for specific pages. Below I’ve linked to help files on how this works with various platforms. There are more sophisticated membership options out there if you plan to do this beyond the Coronavirus pandemic closures. Let me know if you want those details or tutorials.
Dropbox
You can upload a video that people can view via Dropbox or download to their computer to watch. Click this link to test it out with a video I uploaded.
With Dropbox just watch out for the size limitations. Videos have larger file sizes and you’ll run out of free space before too long, especially with long videos.
Google Drive
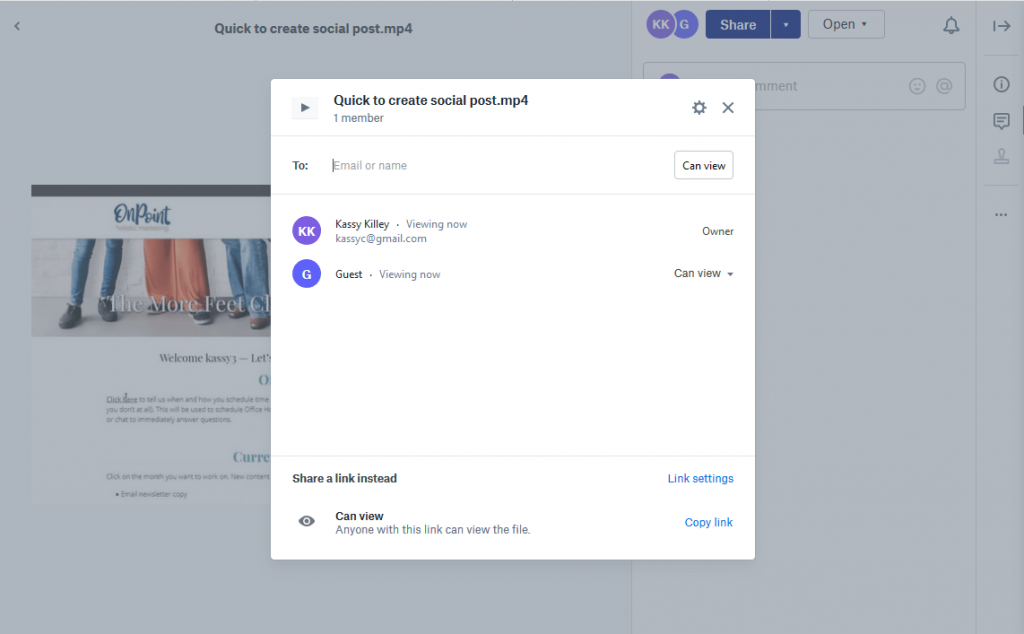
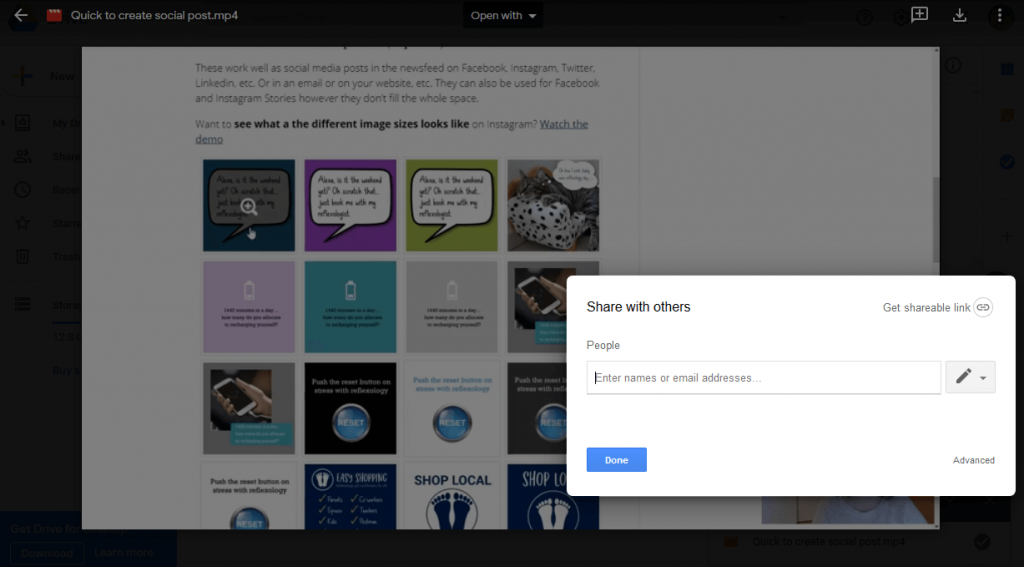
Google Drive works similarly to Dropbox, you can upload a file, they can play or download the file and you can control access with sharing settings. Click this link to see try it with a video I uploaded to my Google Drive account.
Accept online payments
If you already have a platform for accepting credit cards in your practice, you might be able to use it online too. If you have a website, I’d suggest creating a page where you have the links to make payments for standard offerings. If you don’t have a website, you can send invoices using a couple of different platforms.
If this is something you plan to do long-term you might want a more robust or streamlined option. But for now, I’m suggesting the easier, free (or as low cost as possible), and more accessible options.
Sending Invoices for online payment
Paypal
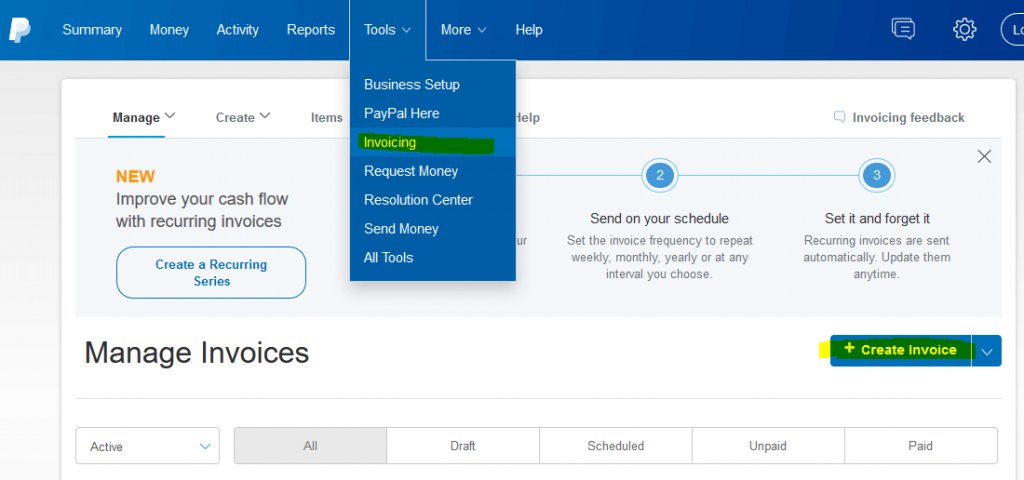
Using a PayPal business account is best to keep track of income when it’s tax time (you can convert your personal to business or create a separate business account). There are several ways to use PayPal, including sending an invoice if you have the person’s email address.
I’ve listed PayPal first since many of you already have and use it. While I like Wave (see below) better, it’s not worth setting up a new program if you already have PayPal.
Wave
Wave is an invoicing tool I’ve used for years with my freelance work. If you’re not already using PayPal (or another credit card service) this is the one I recommend.
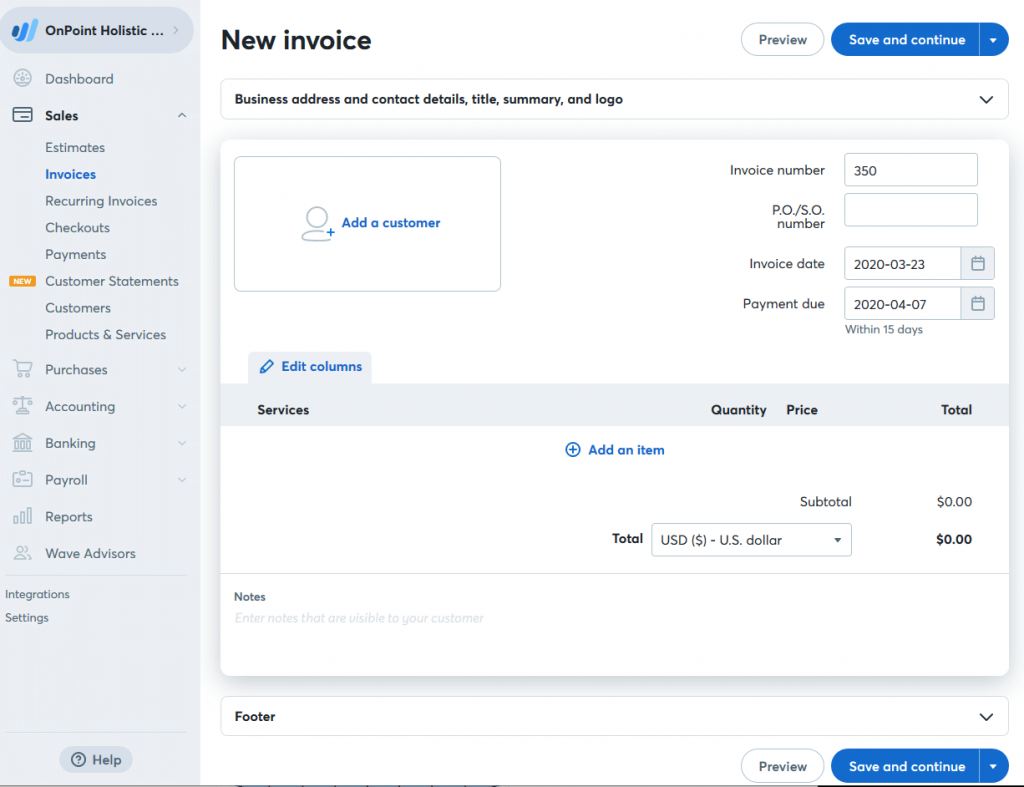
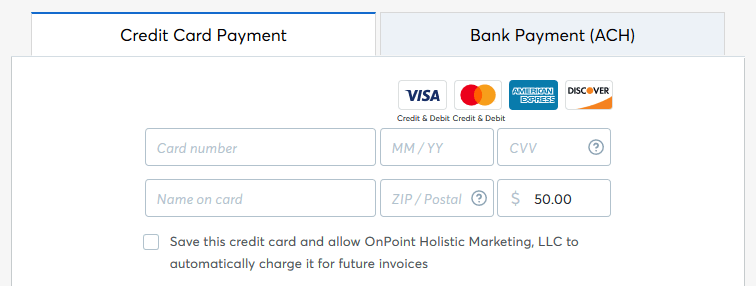
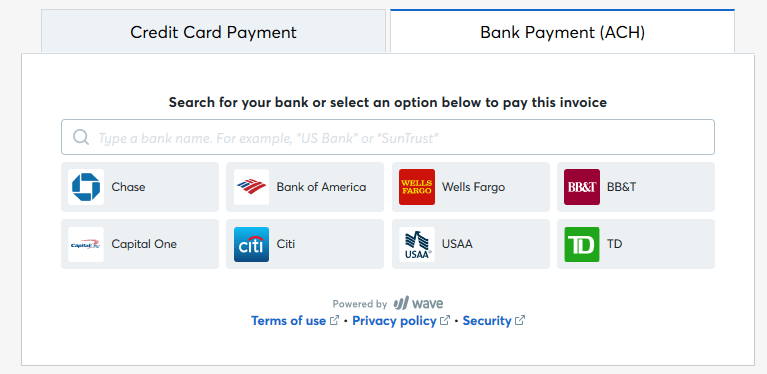
It’s great for invoices and payment options. People can pay online with a credit card, via a bank payment online, or even mail you a check. If needed it syncs up with PayPal as well. Some of my clients have made payments via PayPal and I can easily apply it to their invoice for my bookkeeping.
Wave also offers accounting features for free. The processing fees for credit card payments are the exact same as they are with PayPal and Stripe (2.9% + USD $0.30 per transaction). They also offer the option for clients to pay with a bank transfer and only charge a 1% fee with it. (Which they said they are waving for a few weeks due to the Coronavirus closures.)
Square
According to their website, you can also send invoices using Square. If you’re already using it in your practice, this might be the better choice. But I haven’t used it to accurately compare.
Links to put on your website
PayPal.me link
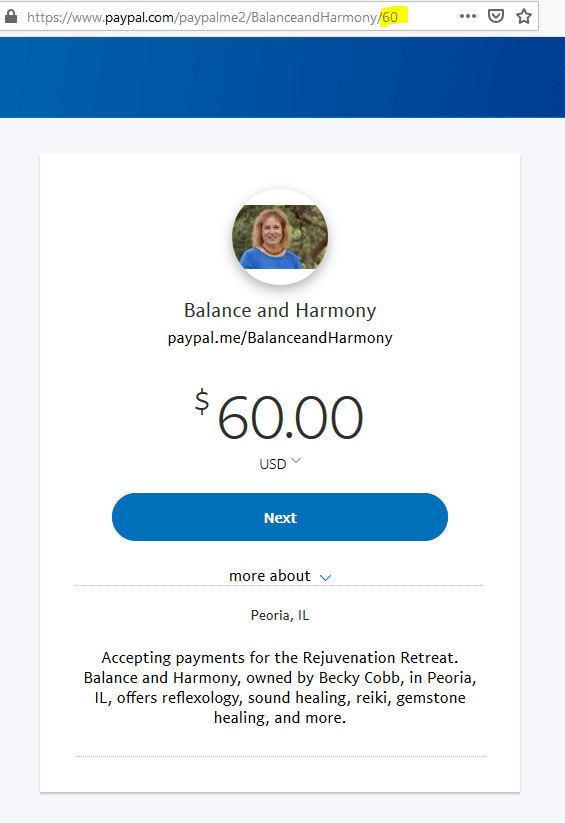
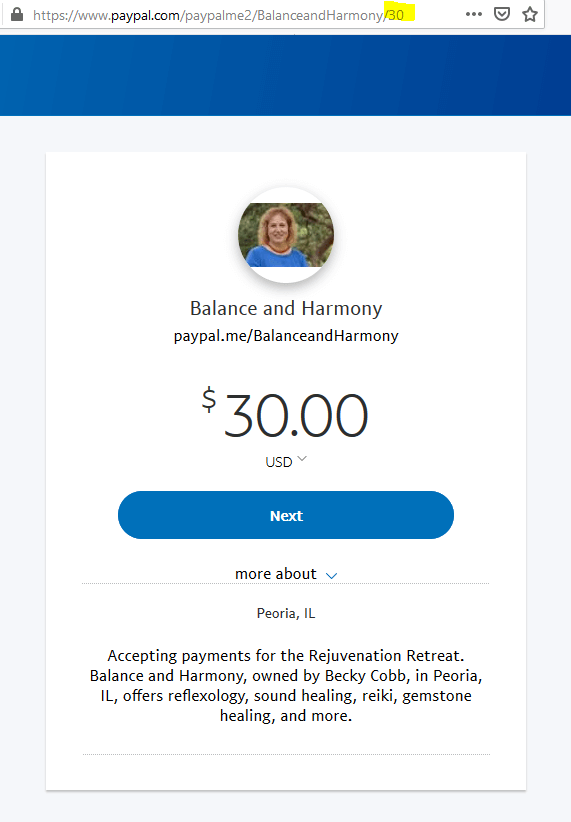
Using a PayPal.me link is easier than setting up a PayPal button. You can create a customized link either for a set amount or a flexible amount that people can click on and pay you. It works with your PayPal account too. The only issue is that it might not feel clear to people what they are purchasing if you have multiple options. You can see from this screenshot that we used to accept payment for an event that we added the info to the description at the bottom. You can change the set amount by changing the number at the end of the URL.
Wave
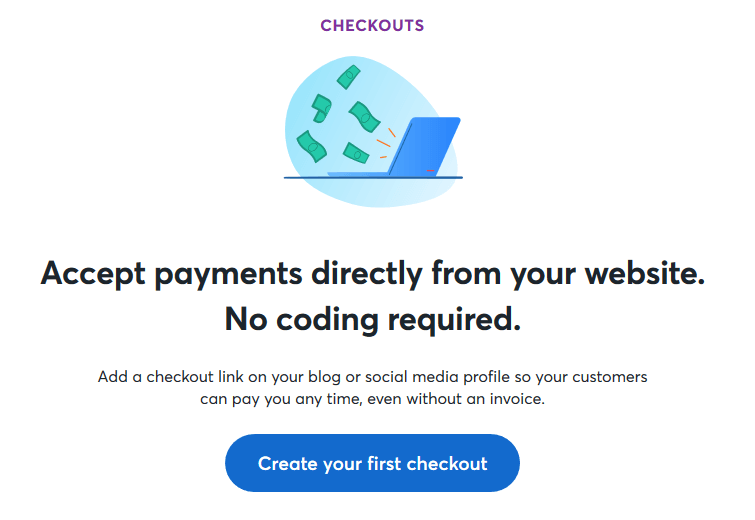
This is a new feature that Wave is now offering and it looks extra easy because it says you don’t have to do any coding. You can see my comments above in regards to choosing PayPal or Wave, but if adding code to your website is stressful, this looks to be an easier option.
The downside is that they don’t allow you to redirect to a page on your website, so if you are selling a digital product, it’s not as easy to deliver immediately. If you’re selling a class, you can use the thank you message to let them know you’ll email them in a few days (or whatever time frame you expect) with the link to the class.
PayPal Buttons
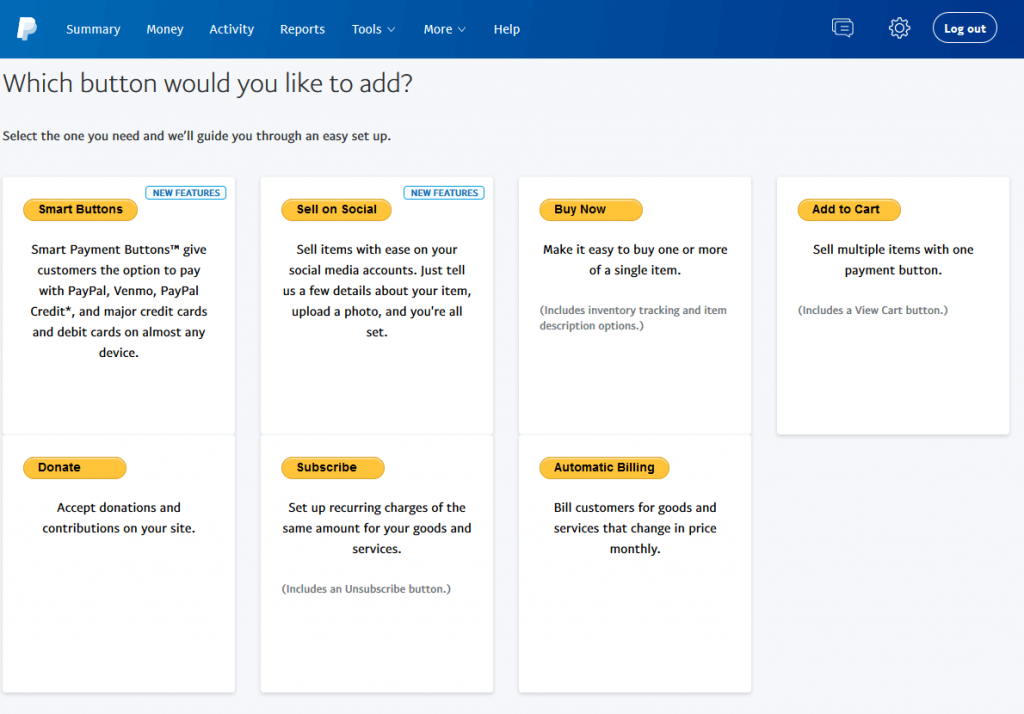
Go to Tools > All Tools > PayPal Buttons to see the different options they provide to help you put a payment button on your website. You’ll need to be able to add some code to your website to use any of their buttons. Most website platforms make this fairly easy to do, but I know it can still feel a bit more complicated.
Square
You can also use Square to accept payments on your website if you’re already using it in your practice. Since I haven’t used this platform, I can’t offer as many details.
Creating Online documents/ebooks/checklists/etc.
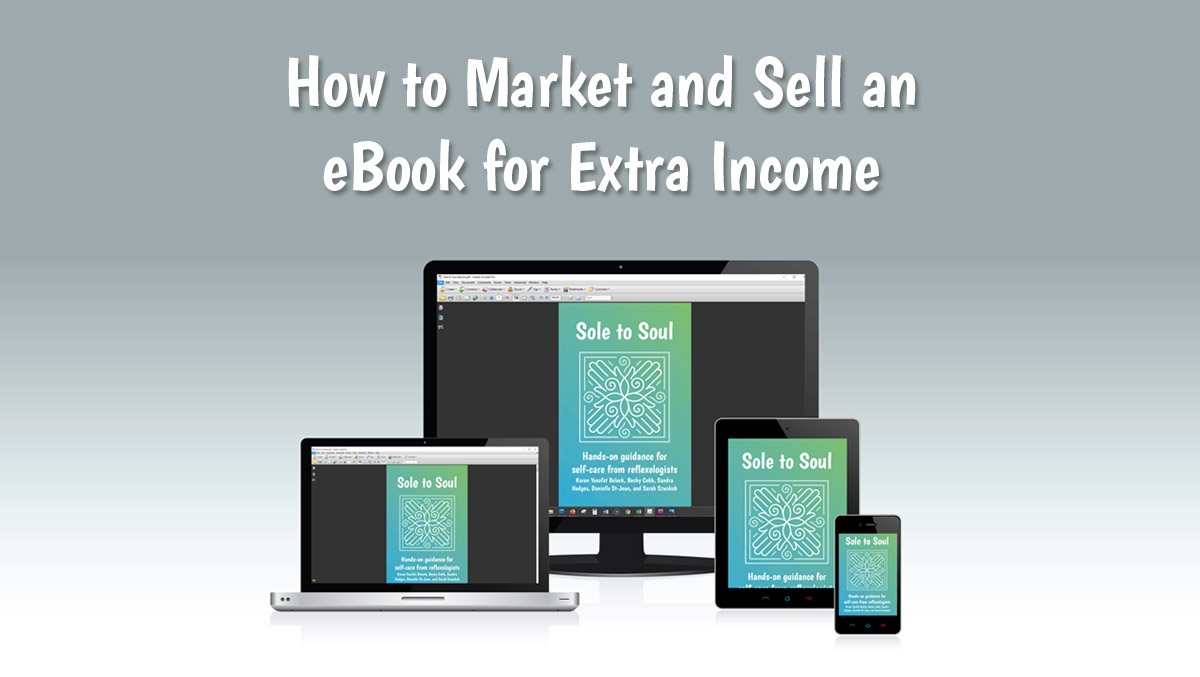
You have a few choices when it comes to creating digital documents to sell (or use as part of a membership, or give away for free). Which ones is best will vary based on your software, skills, the intended use, and your audience.
A PDF is the best choice for things you want them to be able to read, save, print, and open on any device. PDFs are the most universal file format and retains it’s formatting on all devices. With the right software, you can even create editable fields on the PDF too. The downsides to a PDF, in my opinion, are that they get funky for those trying to copy-and-paste from it and they often aren’t formatted well for reading large amounts of text on a page using a phone.
There are instances where it might be better to create an editable or copy-and-paste friendly document for your audience. This could also apply if the document is text only and you’re not worried about formatting adjustments. There are a number of programs that can do this, such as Microsoft Office (Word), Google Drive (Docs), Open Office, Apple iWork (Pages), etc. I think the most versatile file types to save the finished file as would be either as a .doc file or using Google Docs.
Create a PDF using Microsoft Office programs
If you have Microsoft Word, Publisher, Powerpoint, even Excel software on your computer, you should be able to save the file as a PDF once it’s finished and ready to distribute. (Some older versions might not offer this option, however.)
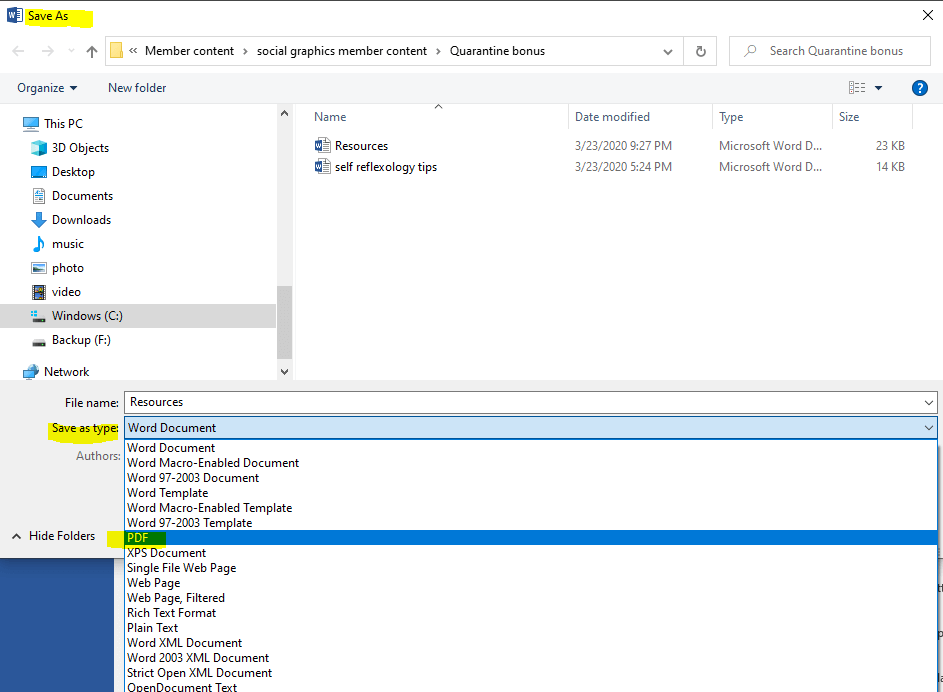
Apple iWorks, Open Office, etc. all work similarly with newer versions of the software allowing you to either choose Export or Save As to select the PDF file type.
While there are other options for older desktop programs, if you don’t have this option integrated, I’d choose to work with Google Drive (Docs) in that case since it’s free and easy to use to save your file as a PDF and makes it easy to share with your audience.
Create a PDF with Google Docs
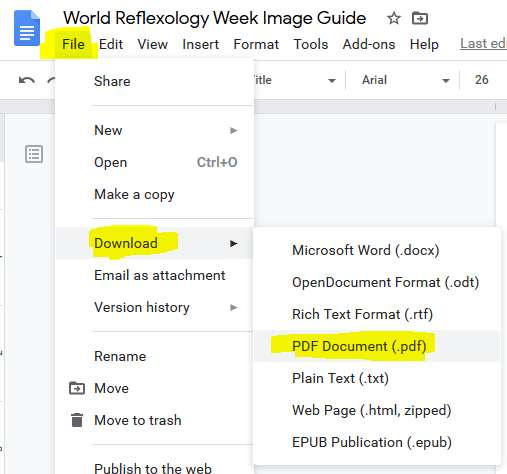
Let me know if you want a tutorial or overview on using Google Drive programs like Docs, Slides, etc. Otherwise, create the content you want and use the File > Download option to save the file as a PDF.
Creating a Kindle ebook
This is not the easiest method to create an ebook (PDFs are much easier to make). Nor will it give you the most income since Amazon needs their cut for distributing and managing the process. For widely distributed books, being on Amazon can help you reach new people but for small scale ebooks it’s hard to get enough sales to start being suggested on Amazon’s site. That said, Kindle books are an easier way for your audience to read your ebook on mobile devices.
Here’s an article I found online that explains all the crazy royalties and fees associated with selling a Kindle ebook on Amazon (as this isn’t my area of specialty, but this article sounds correct based on my knowledge).
Delivering online documents/ebooks/checklists/etc.
You’ll need to figure out how you’re charging for the content (invoices, links on your website, etc.) and then you’ll need to provide it to the people who buy it.
This is going to work much like the options for the videos (see above). The easiest to manage for free is probably to use Google Drive or Dropbox. Depending on the file size you can also just email the files (there’s usually about a 25mb file size limits with emailing files.)
You can also host them on a password protected page on your website.
Files aren’t as user-friendly on Facebook though, so I’d skip that option for the storage. You can use Google Drive or Dropbox or your website to host the files and then provide a link to it via Facebook though.
You can also use a service like Etsy for this, though you won’t get to keep the full selling price and there are other pros and cons to Etsy. The biggest being that you’re reliant on that platform and if they change the rules, or decide you can’t sell anymore, you lose all the reviews, etc. It’s a big marketplace that people know and trust though and will handle all of the transaction details for you. That said, if you plan to continue with this long term, there are probably better solutions in my opinion that let you retain more control and profit.
Using Images
A lot of people think it’s okay to do a Google search for images and save whatever they like. However, most of these are not licensed for this type of use. They are protected under copyright law unless the photographer/illustrator/artist had made them available for use. You should always double-check the licensing before using images for commercial use.
Free Image Sites
These sites let individuals upload images for free use which seems great, but you do have to be careful using these sites. There’s a risk that comes with them. Anyone can upload anything to them. Which sometimes means people upload work they don’t actually have permission to upload. I’ve seen countless stories of people getting legal Cease and Desist orders or demands for large payments for the rights to use the images they got from a “free” image site. I’m not saying don’t use them. Just be aware of the risks. Also, the quality isn’t always as good nor do they have a great selection of reflexology graphics. That said, here are my go-to “free” sites:
- Pixabay (photos and illustrations with a large selection)
- Unsplash (just photos heavy and no reflexology photos)
- Pexels (mostly photos, more variety but not always as good of quality as Unsplash)
Paid Image Sites
You can get better quality and more diversity of images. For your needs right now, most of the standard plans will cover your needs. For example, Deposit Photos says their standard license includes up to 500,000 for print books and no limit on ebooks, even if you use the image for the book cover. Just be sure to double-check the licensing as it does vary from site to site. Here are the sites I find to have good quality yet more affordable prices. Sometimes you’ll find the same image on all the different stock image sites, but others will only be on one or the other. These are the sites I look at most often when purchasing images:
Deposit Photos
UPDATE 4/14/2020: The AppSumo deal is back! Probably the best deal for stock photos unless you only need 2 or 3 that you can get from CanStock. Here’s the link to get 100 Deposit Photos images for only $39. This deal won’t last long and will expire in a few days or maybe weeks.
I use Deposit Photos the most these days thanks to a deal I got through AppSumo. They do offer their own sales that are fairly reasonable too. The best deal for a small number of images is their Flexible monthly plan (USD $29), but you’ll need to remember to cancel it after a month. If you’ll need a bunch of images this is probably the best offer, but if you only need a couple, check out the others below.
CanStock Photo
CanStock Photos prices by image size so the price varies depending on the file size you need. You’ll need 300 DPI for anything that will be printed. If it’s just an ebook only, you can get away with the 72 dpi images. I’ve personally used this site over the years on a number of projects. The nice thing about them compared to Deposit Photos is that you can buy just one image at a reasonable cost, or a smaller package of credits if you only need a couple of images.
123RF
123RF also works with different pricing (credits) depending on the file size. They cost a little more than CanStock per image, but also have different choices and still are one of the more affordable options. They occasionally have sales too. I find their extended license pricing to be more affordable if you have ideas that require that license level.
Design Marketplaces
There are other sites that can be helpful too… they have stock images but also other design resources too. They tend to have more generous commercial licenses too. Here you’re usually buying each image separately vs credits or packages are more common with the stock image sites above. These don’t have much in the way of reflexology graphics, but if you’re needing other types of graphics, then they might be a good option.
- Creative Market (better selection, a little higher prices)
- The Hungry Jpeg (a bit cheaper but I find the selection more limited)
- There are others that I haven’t used, plus Etsy, or Fiverr too. (Be very careful using Fiverr though, the illustrators too often steal others work, even when they say they don’t use stock images and sadly I know from experience and was lucky to catch it.)
Create custom products
One other option for those with artistic talents or idea creativity is to create wall art, t-shirts, mugs, pillows, etc. with messaging or designs you think your clients would buy. I saw one reflexologist on a RAA post share an amazing reflexology watercolor (see the Facebook post embedded above) that she could sell as a design on the products sold via Teepublic or Red Bubble, etc. Let me know if you’re interested in these and need a more detailed tutorial.
Teepublic
I actually put a few designs on Teepublic to give reflexologists a way to have fun proclaiming their passion for reflexology and start conversations and meet new potential clients when out and about.
I’ve noticed many of you have artistic talents that can be translated into designs that would appeal to your clients. Learn how to sell via Teepublic.
Redbubble
Redbubble is similar to Teepublic and actually both are owned by the same company now. I’ve been thinking about using it too as their distribution centers are located in Canada and other countries, not just the US. They also offer some different products for printing, but I’ve heard their quality might not be as good.
Have you seen these other posts?
Comments, Questions, Need More Details?
Phew, that’s a lot of information. You have tons of choices and options. Now that you’ve got an overview let me know if you need some more specific tutorials. I’m happy to create them if I know it’s going to be helpful and what combos you’re likely to use. Comment below or contact me!


